Homemade Blackberry Wine Recipe:
A Step-by-Step Guide:

Introduction
Every sip of blackberry wine captures the rich, sweet-tart essence of ripe blackberries, making it a delightful and satisfying beverage. A taste of summer that you can enjoy all year long, this homemade wine is as enjoyable to make as it is to drink. This recipe for blackberry wine will walk you through every step of the process, from choosing the ideal berries to bottling your creation, whether you’re an experienced winemaker or a beginner looking to try something new.

Why Make Blackberry Wine?
Blackberries are abundant in late summer, making them a perfect fruit for winemaking. Their natural sweetness, combined with a slight tartness, creates a well-balanced wine that can be enjoyed on its own or paired with various dishes. Additionally, blackberry wine is rich in antioxidants, offering not just great flavor but also potential health benefits. Making your own wine also allows you to control the ingredients, ensuring a natural and preservative-free beverage.
Ingredients
To make blackberry wine, you’ll need the following ingredients:
- 4 pounds (1.8 kg) of fresh blackberries
- 2.5 pounds (1.1 kg) of granulated sugar
- 1 teaspoon of pectic enzyme
- 1 Campden tablet (to sanitize the must)
- 1 teaspoon of yeast nutrient
- 1/2 teaspoon of acid blend (optional, for balance)
- 1 packet of wine yeast (Lalvin EC-1118 or similar)
- 1 gallon (3.8 liters) of filtered water
Equipment
- A large fermentation bucket with an airlock
- A fine mesh straining bag
- A hydrometer (to measure specific gravity)
- A siphon and tubing
- A secondary fermentation vessel (glass carboy)
- Wine bottles and corks
Step 1: Prepare the Blackberries
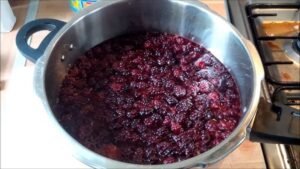
Choose ripe, spotless blackberries first. Pick the best berries you can find because they will have a direct impact on the flavor of your wine. Thoroughly wash the blackberries to get rid of any dirt or insects. After cleaning, put the berries in a big bowl or other container and use a potato masher or other similar tool to mash them. The juice from the crushed berries will serve as the foundation for your wine.
Step 2: Create the Must
The “must” is a concoction of sugar, water, and crushed berries. Spoon the blackberries into a fermentation bucket that has been thoroughly cleaned. First, fill the bucket with one gallon of filtered water; then, add the sugar. Until the sugar is completely dissolved, stir the mixture.
Add the pectic enzyme next, which aids in the fruit’s breakdown and increases juice extraction for a clearer wine. Mix the crushed act tablet with the must. In order to guarantee that only the intended wine yeast will ferment the must, this tablet is crucial for eliminating any wild yeast or bacteria that may be present in the fruit. After covering the bucket with a fresh cloth or lid, leave it alone for a full day.

Step 3: Fermentation
It’s time to begin the fermentation process after a full day. Stir the must after adding the yeast nutrient. The vitamin and mineral content of the nutrient will support the growth of the yeast during fermentation. Next, scatter the wine yeast on top of the must. The yeast will activate on its own, so there’s no need to stir.
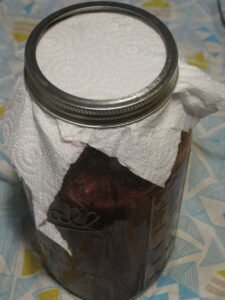
Secure the fermentation bucket’s airlock to it. During fermentation, the airlock lets carbon dioxide out while keeping oxygen out, which could taint the wine. Ideally, the bucket should be kept in a cold, dark area between 65 and 75°F (18 and 24°C). Bubbling in the airlock should signal the start of fermentation, which should happen in 24 to 48 hours.
Step 4: Monitor Fermentation
Over the next week, the yeast will consume the sugars in the must, converting them into alcohol and carbon dioxide. It’s important to monitor the progress by taking readings with a hydrometer. The hydrometer measures the specific gravity (SG) of the must, indicating the amount of sugar remaining. Start with an initial SG reading; it should be around 1.090-1.100.
Check the SG every few days. As fermentation progresses, the SG will decrease. Once it reaches around 1.010-1.020, primary fermentation is complete. This typically takes 7-10 days, but it can vary depending on temperature and yeast activity.
Step 5: Racking to a Secondary Fermenter
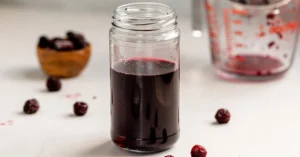
When the primary fermentation is complete, it’s time to transfer, or “rack,” the wine to a secondary fermentation vessel. Racking helps separate the wine from the sediment (called “lees”) that has settled at the bottom of the fermentation bucket.
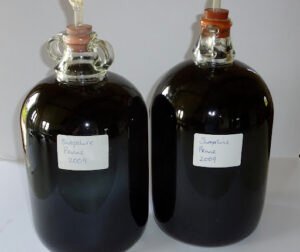
Using a sanitized siphon and tubing, carefully transfer the wine from the fermentation bucket to a clean glass carboy. Be sure to leave behind as much of the sediment as possible. Attach the airlock to the carboy and place it back in a cool, dark place to continue fermenting. Secondary fermentation allows the wine to clarify and develop more complex flavors. This stage typically lasts 4-6 weeks.
Step 6: Stabilizing and Aging
Once secondary fermentation is complete, it’s time to stabilize the wine. Stabilization prevents any remaining yeast from fermenting additional sugars and helps preserve the wine. To stabilize, dissolve another Campden tablet in a small amount of wine and add it to the carboy. You may also add potassium sorbate if you plan to sweeten the wine later.
At this point, you can taste the wine to see if it meets your expectations. If you prefer a sweeter wine, you can add a sugar syrup to taste. However, make sure to stabilize the wine first to prevent re-fermentation.
Allow the wine to age in the carboy for at least 3 months. The longer the aging process, the smoother and more refined the final product will be. Some winemakers age their blackberry wine for a year or more.

Step 7: Bottling
When you’re satisfied with the taste and clarity of your wine, it’s time to bottle it. Sanitize your wine bottles and corks thoroughly. Using the siphon, transfer the wine from the carboy to the bottles, leaving about an inch of space at the top. Cork the bottles and store them in a cool, dark place to continue aging. The wine will improve with age, so if you can, resist the temptation to drink it right away.

Serving and Enjoying Your Blackberry Wine
Blackberry wine can be enjoyed chilled or at room temperature, depending on your preference. It pairs beautifully with a variety of dishes, including roasted meats, rich cheeses, and desserts like dark chocolate or berry tarts. For a special treat, try using your blackberry wine in a reduction sauce or as a base for a refreshing wine spritzer
Conclusion
Making blackberry wine at home is a fulfilling process that results in a delicious, handcrafted beverage. With patience and care, you can create a wine that reflects the unique flavors of fresh blackberries, offering a taste of summer no matter the season. Whether you’re enjoying it with friends and family or gifting it to others, your homemade blackberry wine is sure to be a hit.
Cheers to your winemaking journey!




I wanted to take a moment to express how
much I loved reading this article! You’ve shared amazingly relevant and relevant information, especially for those of us who are
dedicated about taking care of our health. It’s so refreshing to find content that not
only educates but also inspires better choices in such an easy-to-understand way.
I’m definitely coming back to this and will
be sharing your article on my blog about nutrition and healthy living.
Keep up the great work – your content is helping people!